> ## Documentation Index
> Fetch the complete documentation index at: https://docs.apten.ai/llms.txt
> Use this file to discover all available pages before exploring further.
# Microsoft Dynamics 365
> Integrate Apten with Microsoft Dynamics 365.
## Overview
Connect your Apten account with Microsoft Dynamics 365 to sync information about leads and conversations in Apten with your Dynamics 365 CRM. Currently, we support syncing:
* **Tags**: sync tags into a custom multi-select field in Dynamics 365.
* **Default Tags**: sync built-in tags (Hot, Qualified, Has Replied, Unsubscribed SMS, Unsubscribed Email) as individual boolean fields.
* **Summaries**: sync lead conversation summaries into a custom text field in Dynamics 365.
* **Variables**: map variables to Dynamics 365 fields, which will sync in real-time.
* **Do not contact**: sync a lead's do-not-contact status to a boolean field in Dynamics 365.
Dynamics 365 syncing works with AI conversations over SMS, voice, and email.
## Prerequisites
The Microsoft account used to connect must have a **System Administrator** or **System Customizer** security role in Dynamics 365. This is required because Apten creates custom fields on your selected entity to sync tags, summaries, and variables.
## Step 1: Connect Apten to Dynamics 365
1. In Apten, go to **Integrations**
2. Click **Connect** on the Microsoft Dynamics 365 card
3. Enter your Dynamics 365 environment name (the prefix from your Dynamics URL, e.g. if your URL is `yourorg.crm.dynamics.com`, enter `yourorg`)
4. Click **Connect** and authorize with your Microsoft account
5. Click **Manage** to go to the settings page
6. Select the Dynamics 365 object that you want to sync with (Lead, Contact, or Account), and click **Save**
The object selection and environment URL cannot be changed once saved. Choose carefully.
7. If you'd like to sync **Tags**, click **Set up Tag Syncing**. This will create the following custom fields on your selected Dynamics 365 object:
* `new_aptentags` (multi-select picklist with your tags as options)
* `new_aptenishot` (boolean)
* `new_aptenisqualified` (boolean)
* `new_aptenhasreplied` (boolean)
* `new_aptenisunsubscribed` (boolean)
* `new_aptenisunsubscribedemail` (boolean)
8. If you'd like to sync **Summaries**, click **Set up Summary Syncing**. This will create:
* `new_aptensummary` (multi-line text, max 10,000 characters)
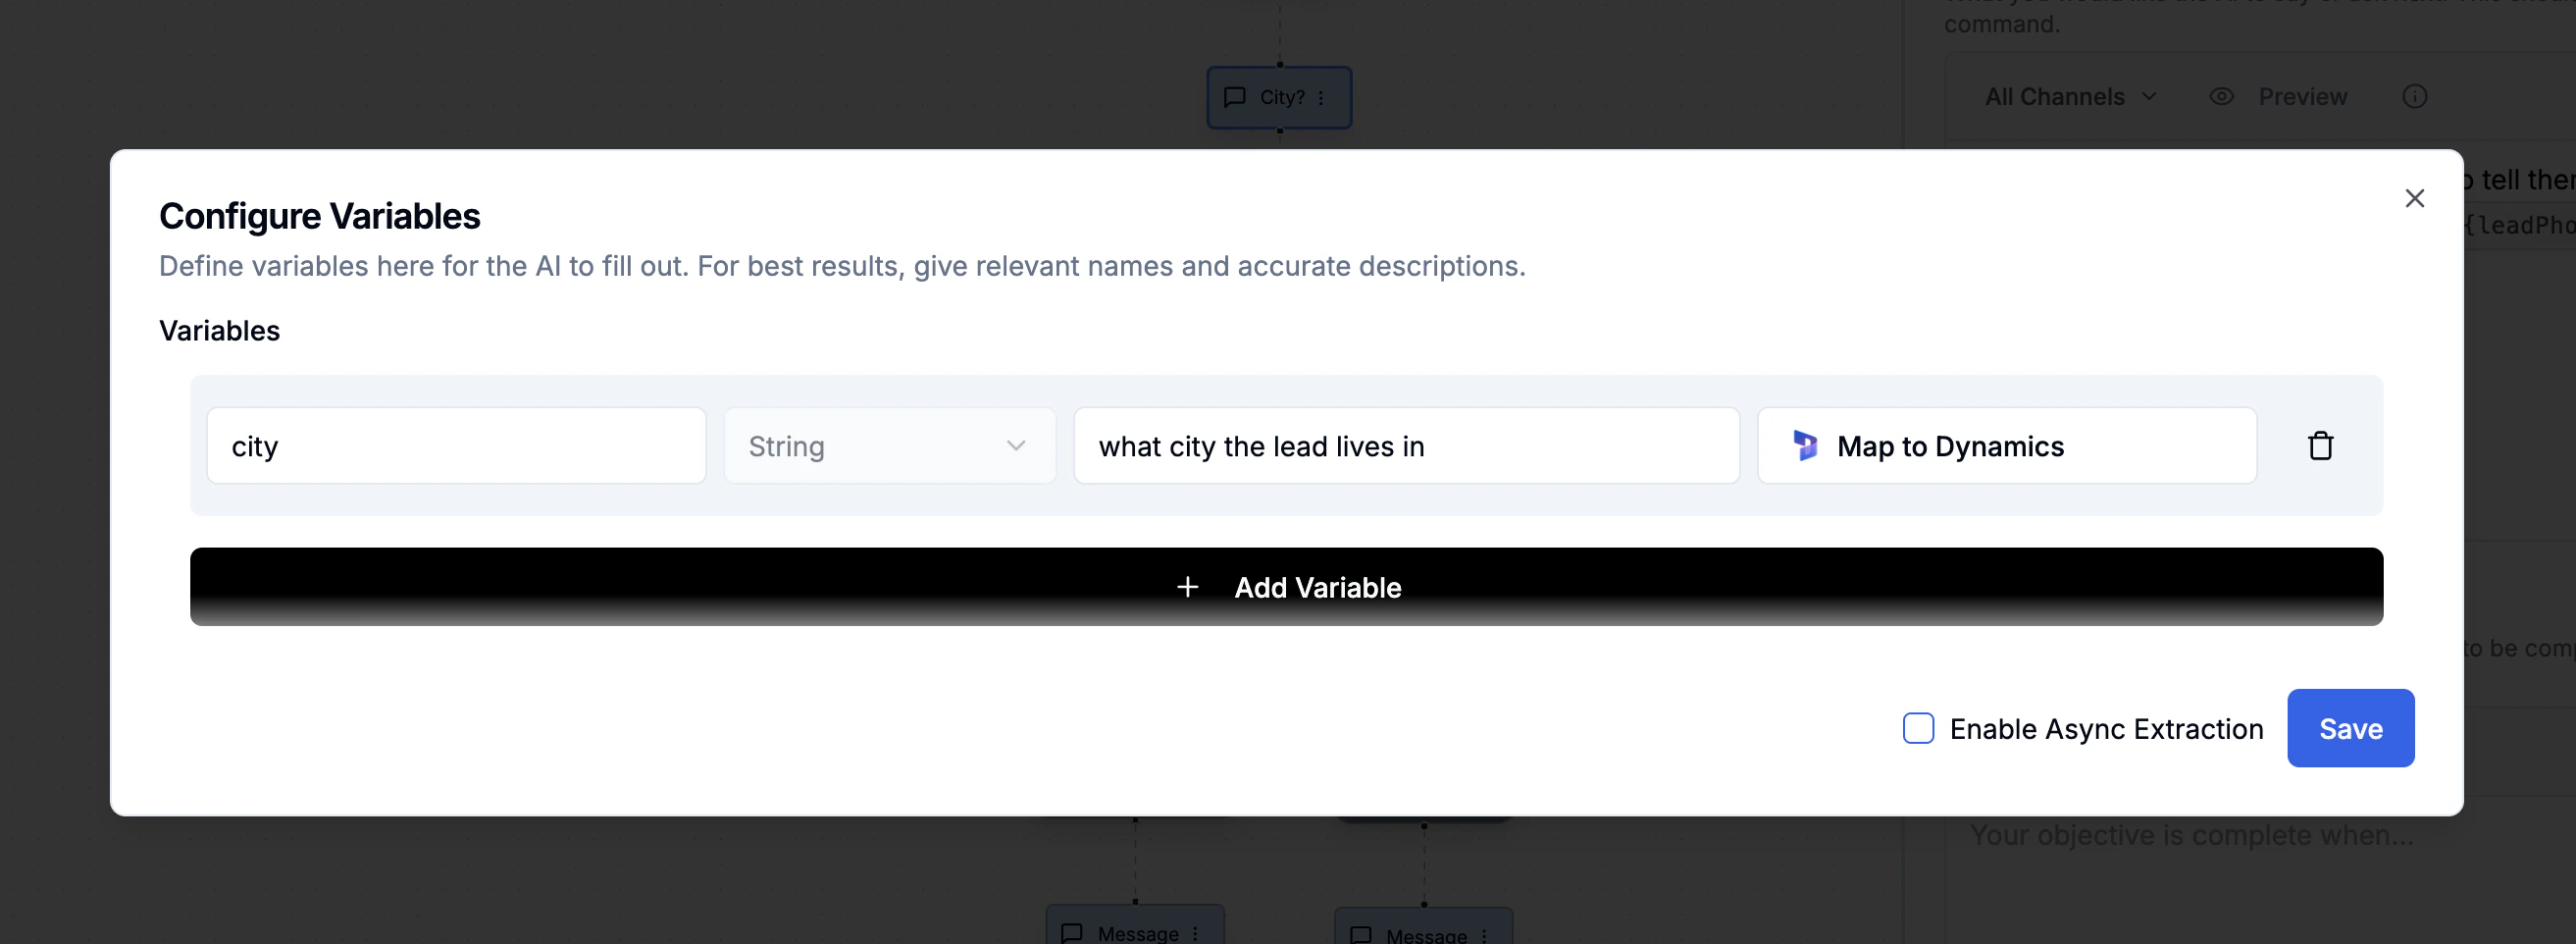
## Step 2: Map Variables (Optional)
When setting up variables in customer profiles in **Build & Test**, you can map them to Dynamics 365 fields.
These fields will automatically sync to Dynamics 365 in real-time when Apten talks to a lead.
 ## Step 3: Import Leads with Dynamics IDs
When importing leads into Apten, you must set the following fields:
* `integrationSource`: Set this to `'dynamics'` to indicate the lead is from Dynamics 365
* `dynamicsId`: Set this to the Dynamics 365 record GUID (e.g. `'a1b2c3d4-e5f6-7890-abcd-ef1234567890'`)
Example payload:
```json theme={null}
{
"firstName": "John",
"lastName": "Doe",
"phone": "1234567890",
"customerProfile": "Test Profile",
"integrationSource": "dynamics", // Required for Sync
"dynamicsId": "a1b2c3d4-e5f6-7890-abcd-ef1234567890" // Required for Sync
}
```
## Step 3: Import Leads with Dynamics IDs
When importing leads into Apten, you must set the following fields:
* `integrationSource`: Set this to `'dynamics'` to indicate the lead is from Dynamics 365
* `dynamicsId`: Set this to the Dynamics 365 record GUID (e.g. `'a1b2c3d4-e5f6-7890-abcd-ef1234567890'`)
Example payload:
```json theme={null}
{
"firstName": "John",
"lastName": "Doe",
"phone": "1234567890",
"customerProfile": "Test Profile",
"integrationSource": "dynamics", // Required for Sync
"dynamicsId": "a1b2c3d4-e5f6-7890-abcd-ef1234567890" // Required for Sync
}
```