

Overview
Connect your Apten account with Salesforce to sync information about leads and SMS conversations in Apten with any Salesforce object. Currently, we support syncing:- Tags: sync tags into a field in Salesforce.
- Summaries: sync lead conversation summaries into a field in Salesforce.
- Variables: map variables to fields in Salesforce, which will sync in real-time.
- Do not contact: sync a lead’s do-not-contact status to a boolean field in Salesforce.
Step 1: Create an Integration User in Salesforce
- Log in to Salesforce as an administrator
- Navigate to Setup > Users > New User
-
Fill in the required fields:
- First Name: Apten
- Last Name: Integration
- Email: [email for the integration user]
- Username: [unique username for integration]
- Role: [assign an appropriate role]
- User License: Salesforce Integration
- Profile: Salesforce API Only System Integrations
- Click “Save” to create the Integration User
Step 2: Create a Permission Set in Salesforce
- Navigate to Setup > Permission Sets > New
-
Create a new Permission Set:
- Label: Apten Integration Permissions
- API Name: Apten_Integration_Permissions
- Click “Save” to create the Permission Set
-
Configure the Permission Set:
- Under “System Permissions”, enable:
- API Enabled
- Under “Object Settings”, enable:
- Read, Create, and Edit permissions for the object that you want to sync with Apten (e.g., Lead, Contact, etc.).
- Field-level Read and Edit access for every field Apten should read from or write to, including fields used for tags, summaries, variables, and do-not-contact status.
- Apten does not require “Modify All Data” or “Customize Application” permissions.
- Under “System Permissions”, enable:
-
Assign the Permission Set to the Integration User:
- Go to Setup > Permission Sets
- Click on the “Apten Integration Permissions” Permission Set
- Click “Manage Assignments”
- Click “Add Assignments”
- Select the Apten Integration User
- Click “Assign”
Step 3: Connect Apten to Salesforce
- In Apten, go to Integrations
- Click Connect on the Salesforce card
- Authorize with the email and password for the Salesforce Integration User
- Click Connect
- Select the object that you want to sync with Apten (e.g., Lead, Contact, etc.), and click Save (you won’t be able to change this later).
- If you’d like to sync Tags or Summaries, click the Set up button next to the relevant section.
- Select the Salesforce field you want Apten to update.
- Important: The Integration User must have field-level access to the selected field, or syncing will fail.
Step 4: Map Variables (Optional)
When setting up variables in customer profiles in Build & Test, you can map them to Salesforce fields. These fields will automatically sync to Salesforce in real-time when Apten talks to a lead.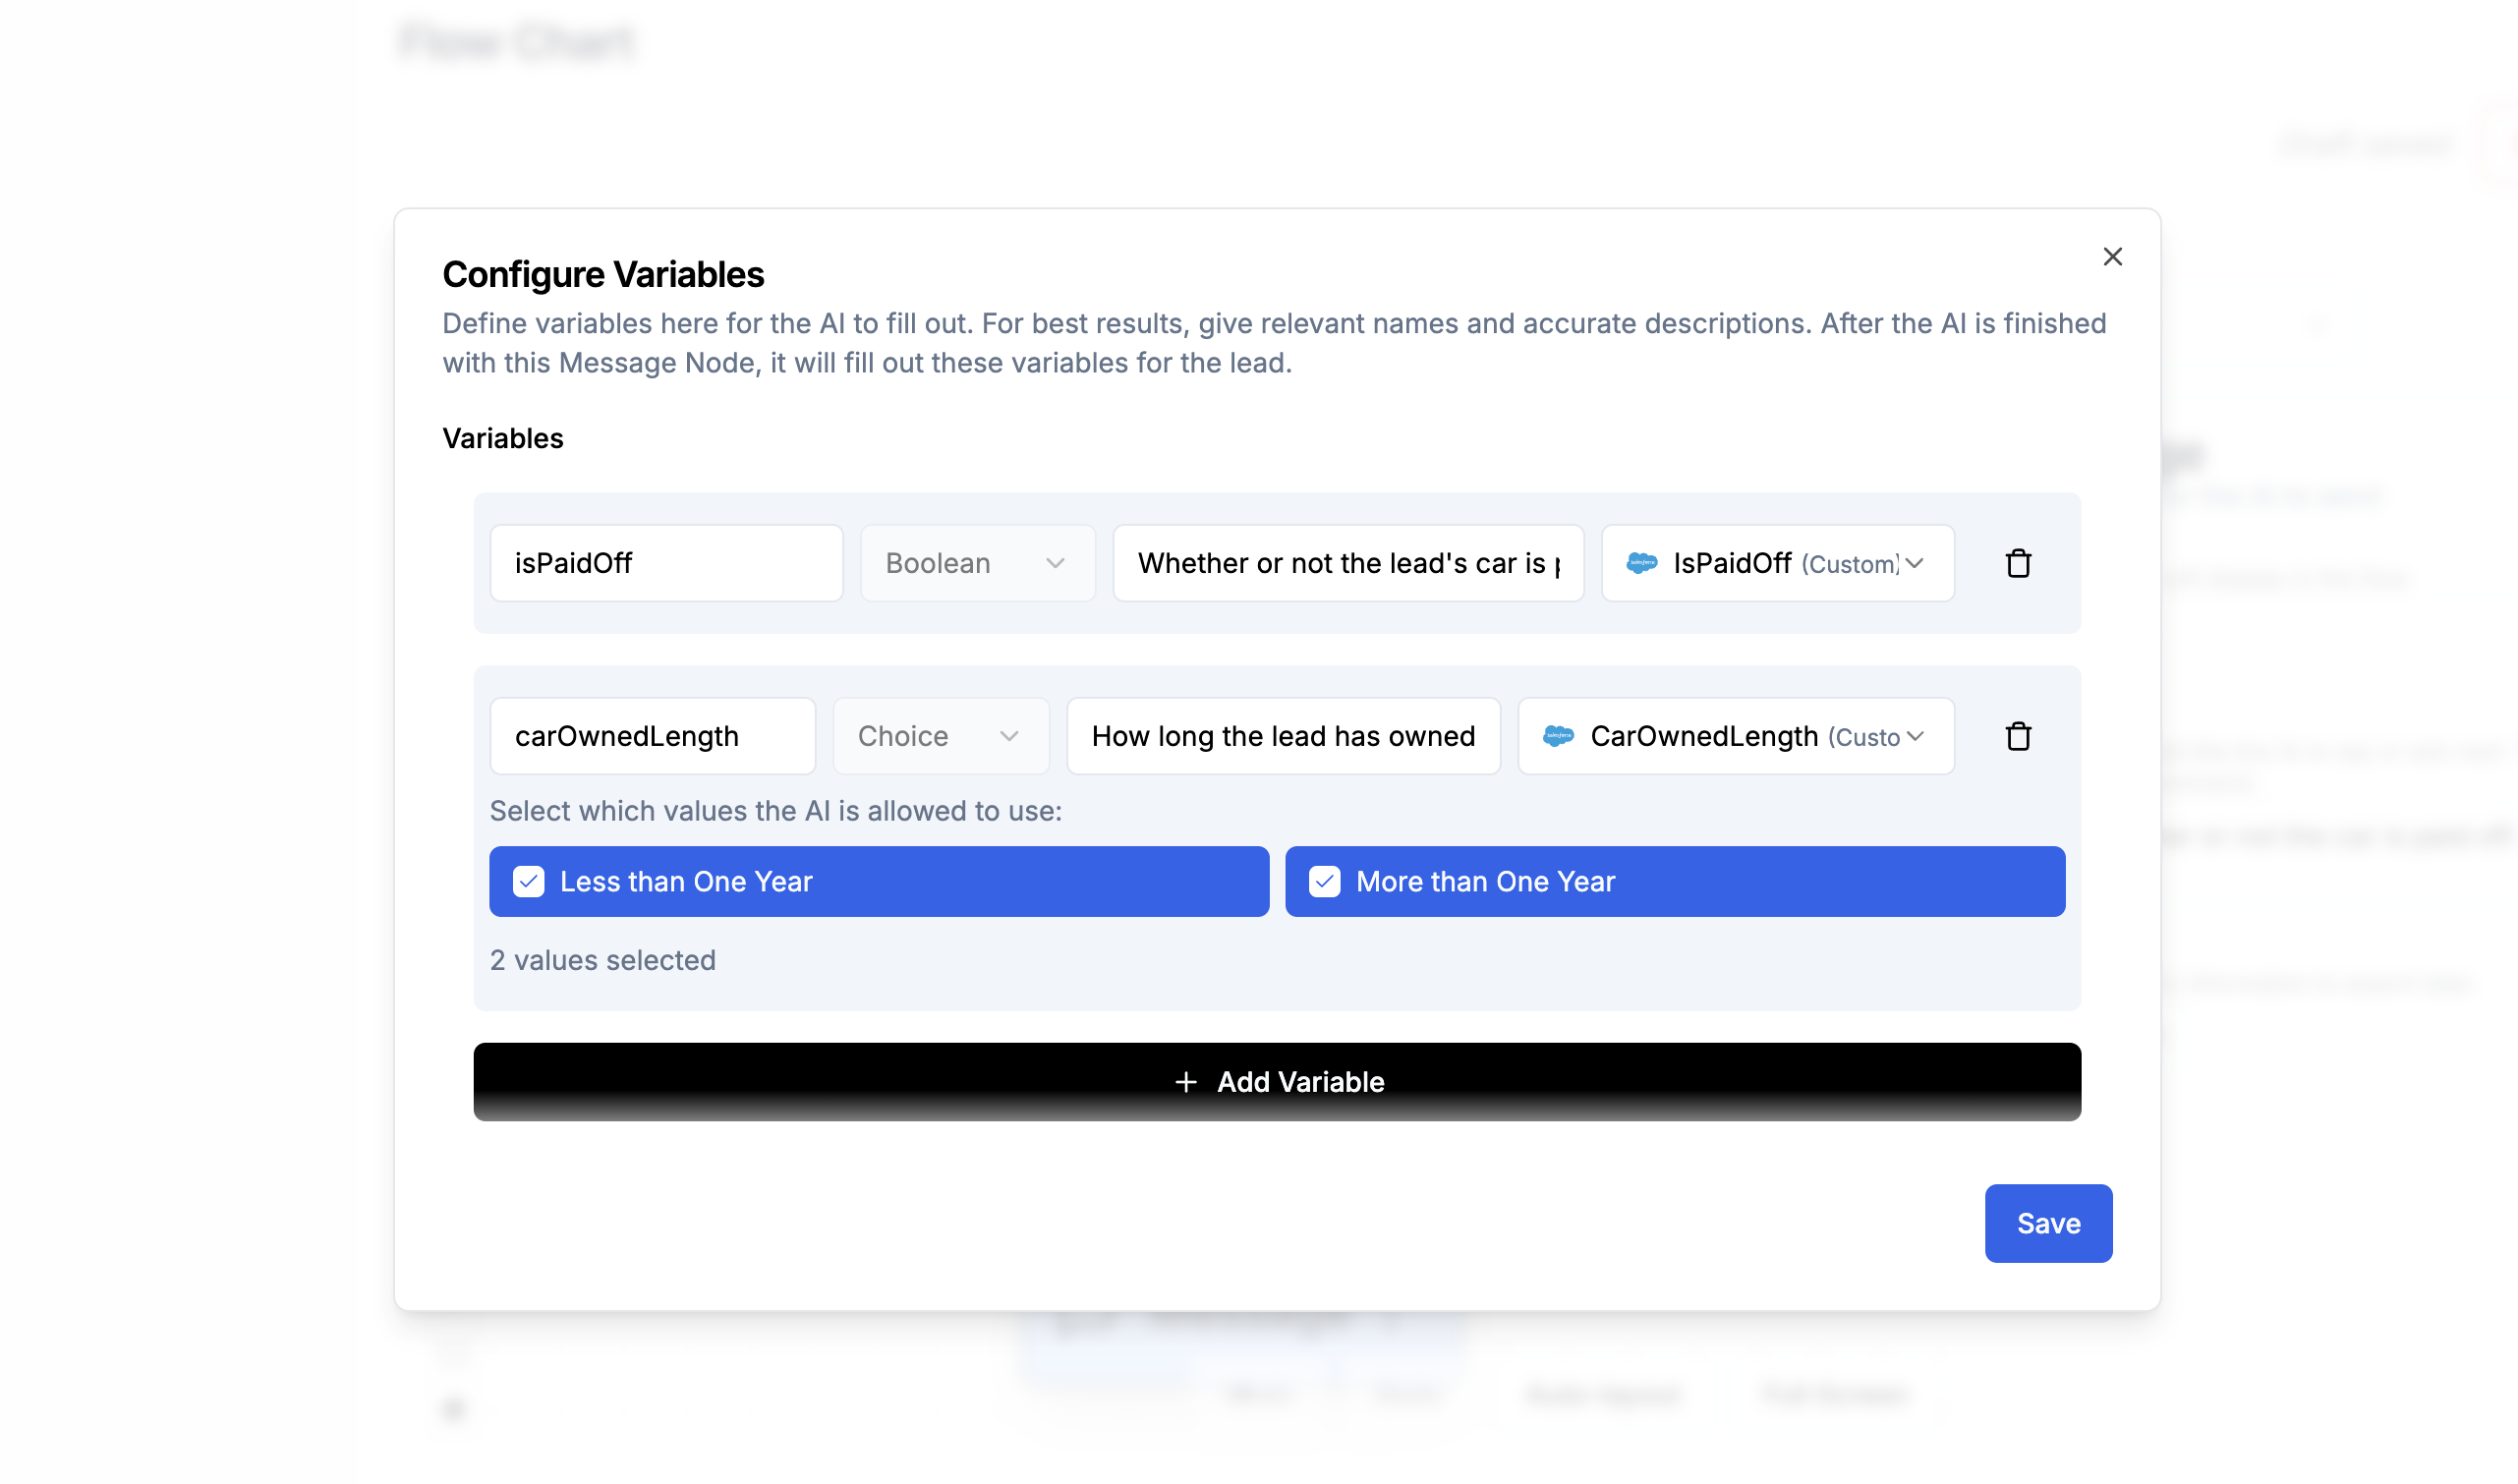
Step 5: Import Leads with Salesforce IDs
When importing leads into Apten, you must set the following fields:integrationSource: Set this to'salesforce'to indicate the lead is from SalesforcesalesforceId: Set this to the Salesforce object ID of the lead (e.g. ‘00Q1a000004XYZ’)